Scheduling EC2 instances with AWS Scheduler
This post describes an out-of-the-box solution in order to schedule your resources with AWS Scheduler.
Background
Recently we did a cost review on our EC2 usage and we found out some inefficiencies that could be easily solved just by scheduling EC2 instances during work hours. After the changes, we have cut our monthly bill by more than half!
We just decided to cover a range from 7am to 7pm during week days.
We chose one pre-built solution AWS Scheduler due to his simplicity and also because aside of scheduling EC2 instances we could also schedule usage on our AWS RDS Oracle instances. The setup can be done in less than 10 minutes.
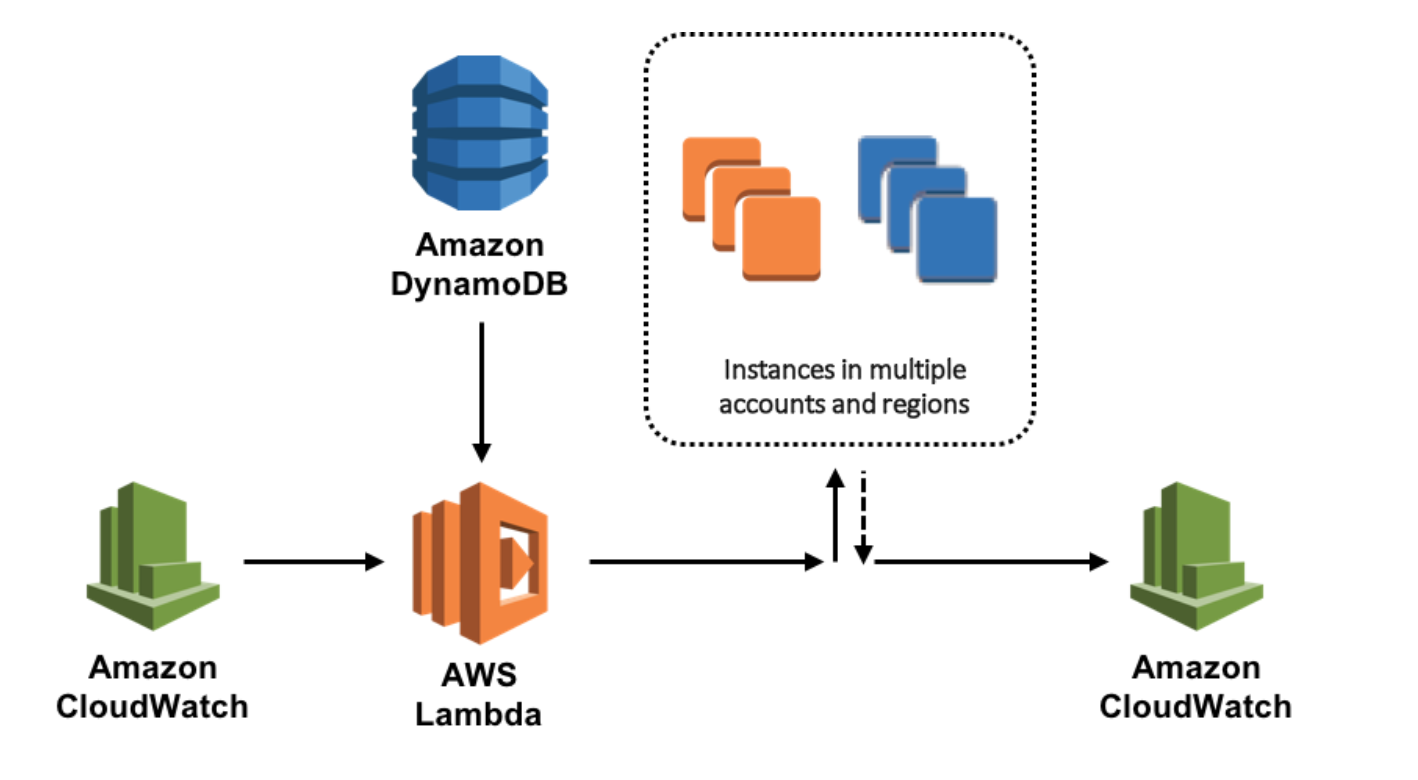
AWS Architecture
See below the architecture diagram
The solution can be installed effortless just executing a Cloudformation template. If you are not familiar with AWS CloudFormation, is just a tool from AWS that allows you to declare and spin up resources in JSON format, policies, permissions, iam roles, lambdas, ec2, vpcs. Anything you can do with AWS console can be “blueprinted” in a document which provides a declarative and repeteable process.
I will assume you execute the cloudformation and follow the instructions here AWS Scheduler CloudFormation Launch template
Components
Once installed the only thing you need to do is configure it, but is worthy to explain the components that are part of the solution to gain a better understanding.
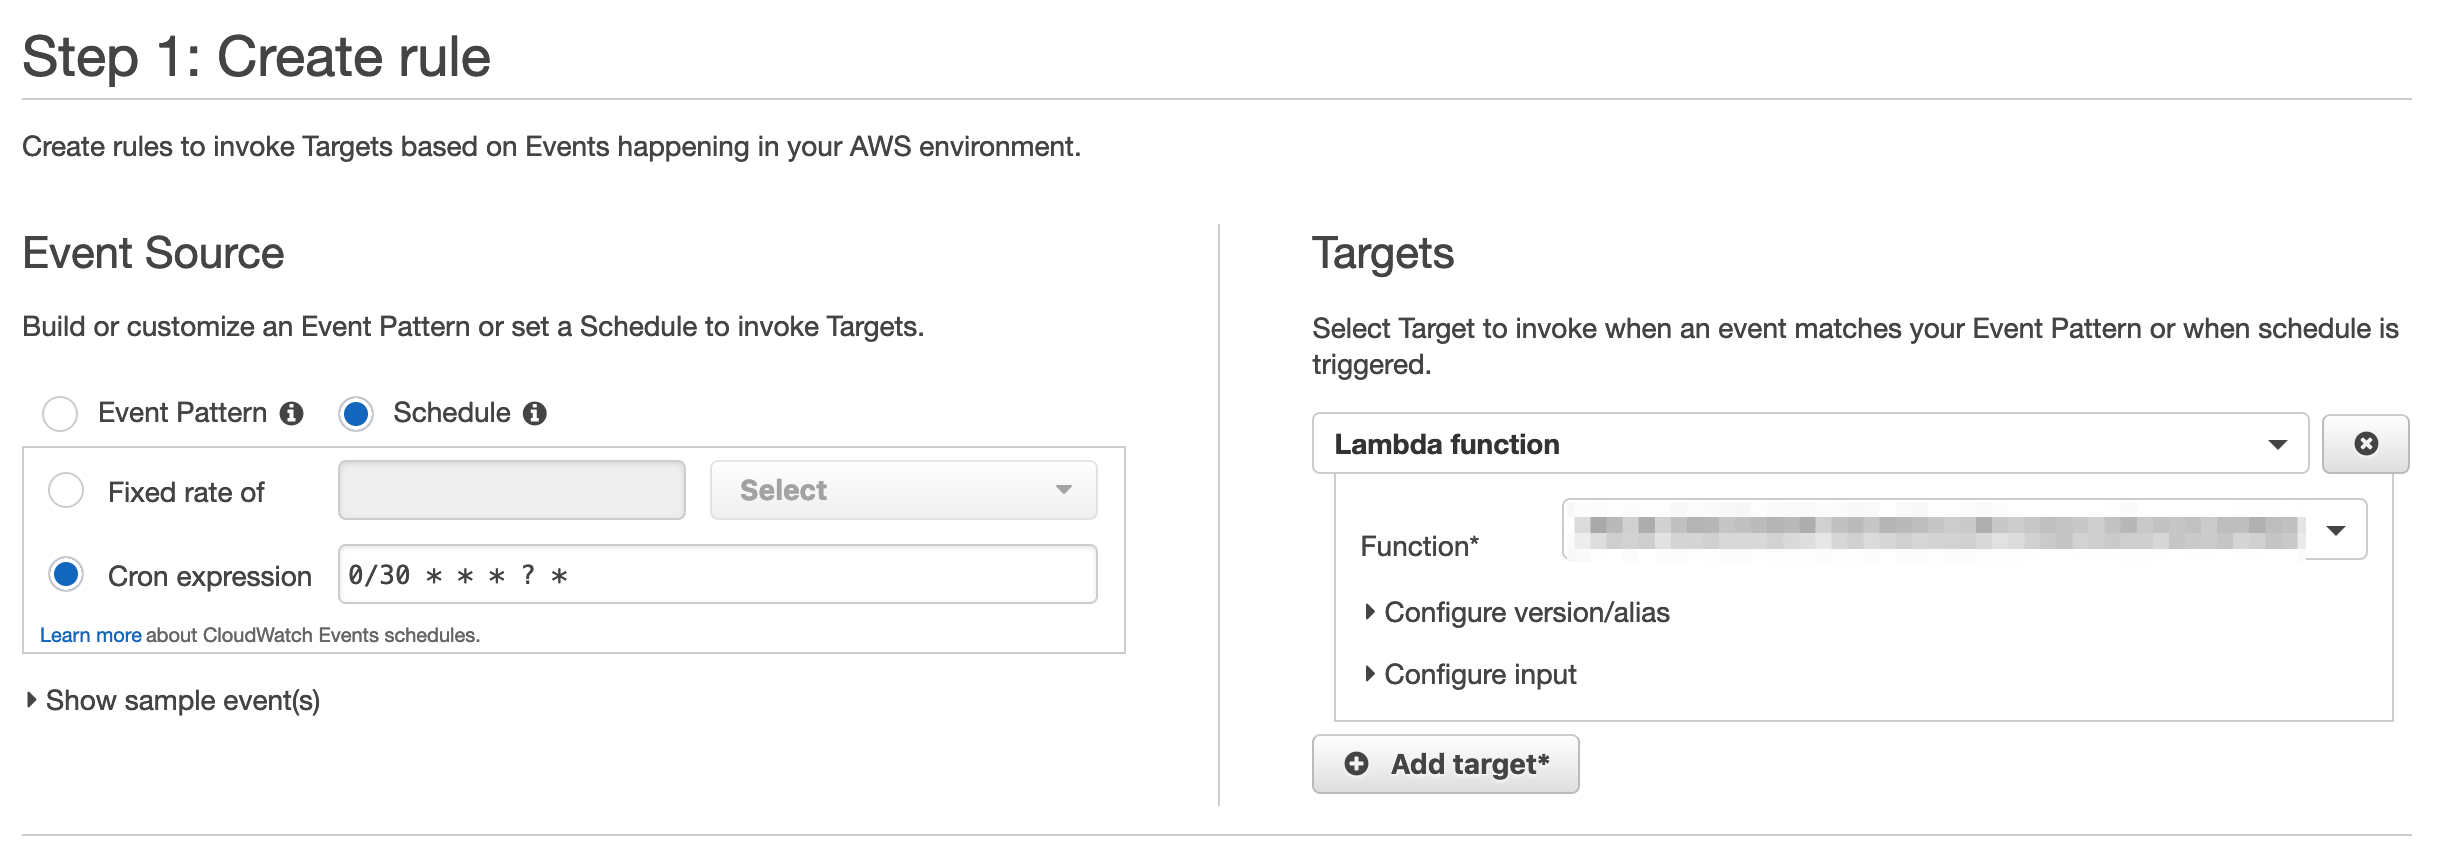
1. Cloudwatch trigger
CloudWatch is a monitoring solution that gather metrics and can setup alarms based on the observation of values.
AWS Scheduler takes benefit of Cloudwatch only with one purpose: Define a configurable rule, a trigger based on a crontab expression in order to emit an event. The event will be consumed by a lambda that will do the heavy-lifting.
In our case we configure the trigger every 30 minutes.
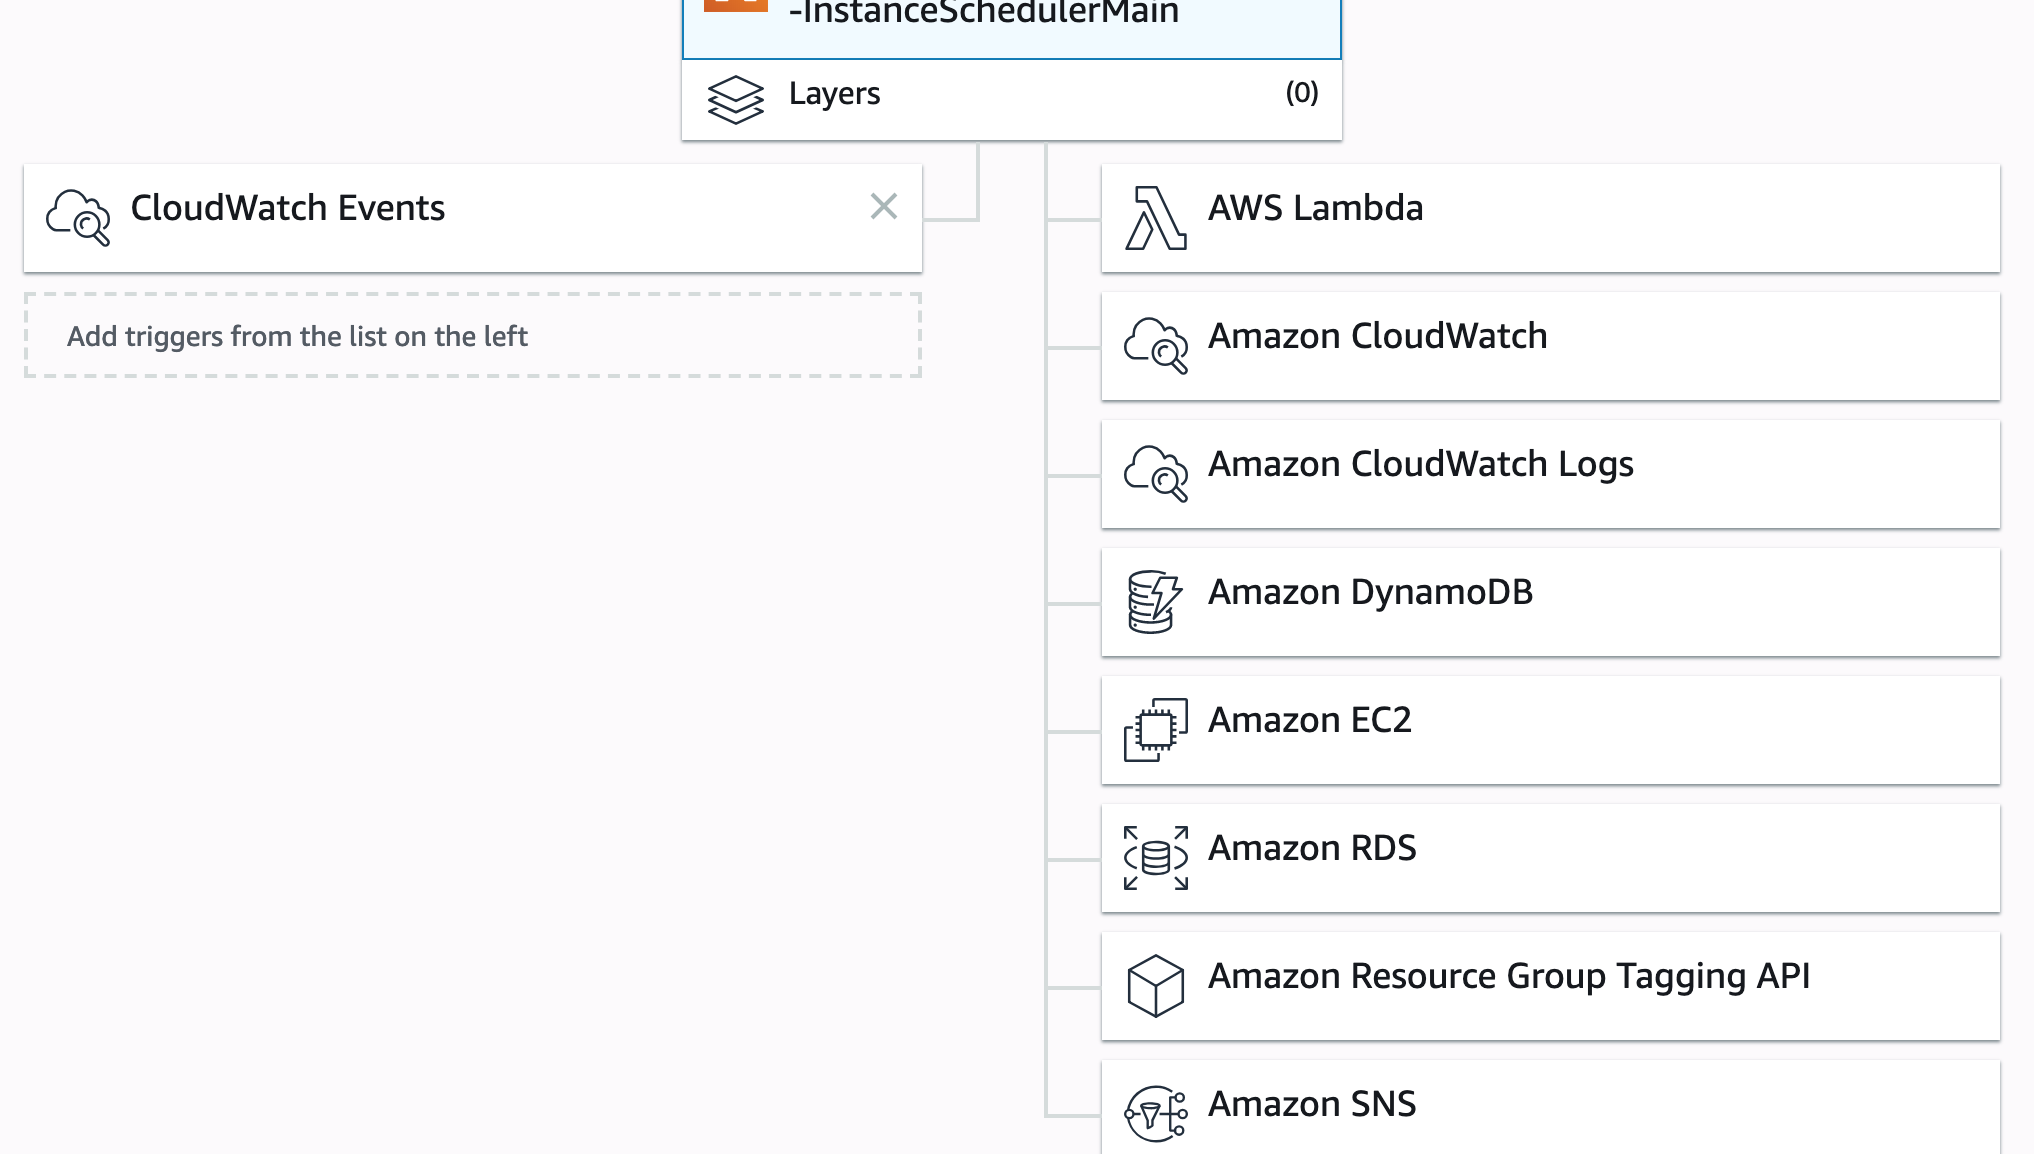
2. Lambda
This is where “the magic” happens. A full python 2.7 application is responsible of handling the event and performing the logic in order to stop or start the targeted resources according to the configuration in your Dynambo database.
3. DynamoDB
This is the important bit that you need to understand, as it drives the configuration of your scheduler.
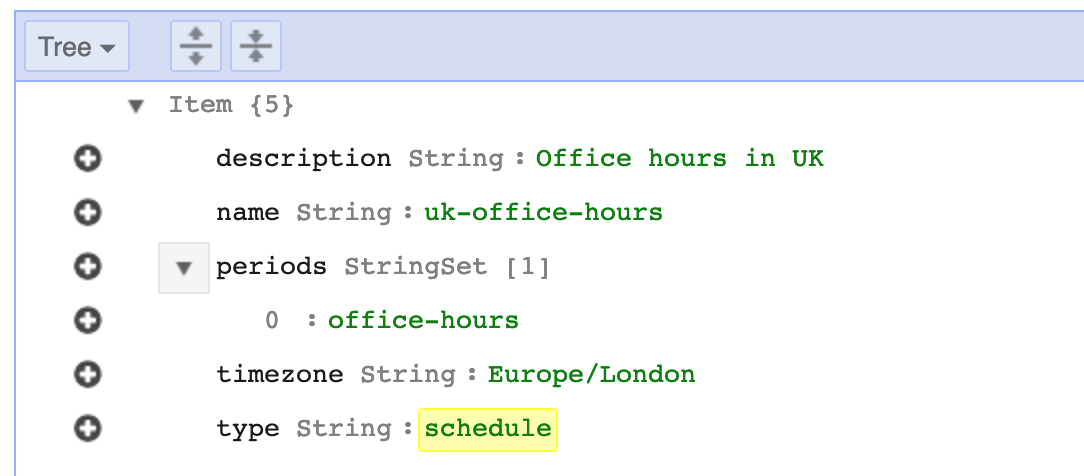
CloudFormation creates a couple of tables in DynamoDB, one of them contains the configuration values used by the lambda to do its job. There are predefined values for periods and schedules. You can tweak them manually on the console, but the recommendation is that you configure it on your cloudFormation template.
You can see the values heading to your DynamoDB service and then visit the Tables section. One of the tables follow a pattern like “YOUR-SCHEDULER-NAME-ConfigTable-XXXX·
There are 2 types of records, periods and schedules. The idea is configure a schedule based on one or more period.
- Periods: Here you can define start, end, timezone, regions,etc Our period is “office-hours”
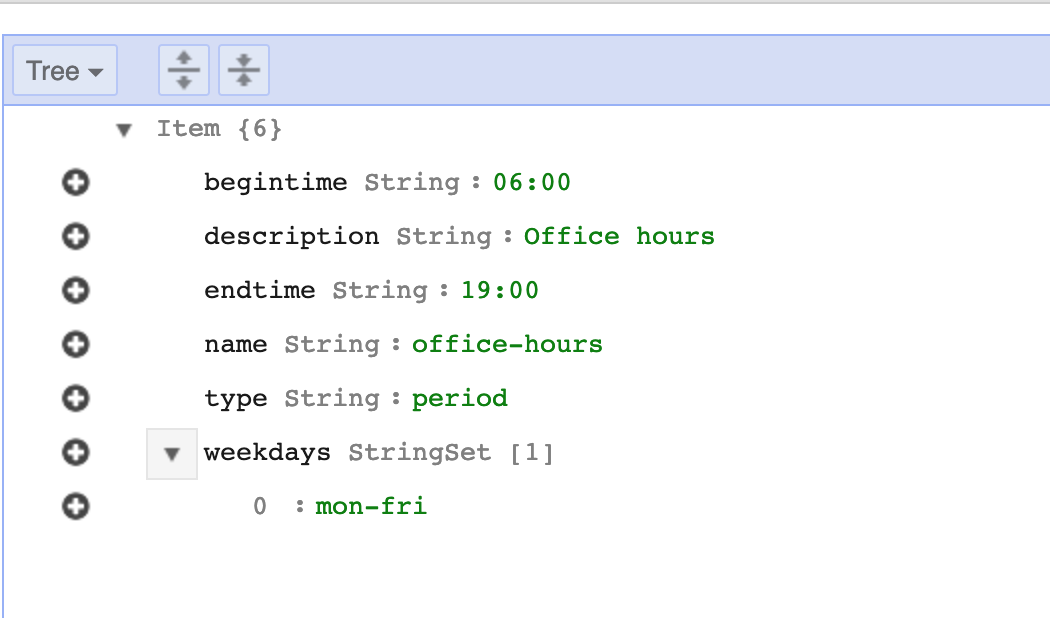
- Schedule: A schedule is made of one or more periods. Our schedule is “uk-office-hours”
4. EC2 settings
The final piece of the puzzle is just tagging your EC2 instances with exactly the same name as you defined on the schedule, in my case “uk-office-hours”.

Note: Do not make the same mistake as me. I accidentally tagged the EC2 instance with the period value instead. Nothing worked, but was easy to find the error because the solution is integrated with CloudWatch logs and I could see a message, telling me that something was wrong.